

Alternate ways to control BandHelper
TL;DR
In addition to clicking the buttons for various functions on the screen, you can go to Settings > App Control in the apps to set up convenient screen gestures or remote control devices like foot switches to trigger the functions you use most often.
App control actions only work while viewing a set list or smart list. You can watch a tutorial video, or read on for complete details.
To control BandHelper more easily from your screen
- Open the Settings > App Control window and click Add An Action. Click the action you want to trigger, then click Layout Actions and select the gesture you want to trigger it with. For example, to start and stop auto-scrolling by clicking with two fingers anywhere on the screen, click Start/Stop Auto-Scroll and select Two-Fingered Tap. (Currently, two- and three- fingered tap gestures are not supported on Macs.)
- You can assign multiple actions to the same gesture if you want to trigger several actions at once. For example, you could map the Two-Fingered Tap gesture to the Start/Stop Auto-Scroll and Start/Stop Recording actions.
- The Next Song and Previous Song actions are assigned to the Left Swipe and Right Swipe gestures by default, but you can remove those assignments to use left and right swipes for other actions instead. However, you would not want to trigger a Next/Previous Song action and another action with the same swipe gesture because most functions will reset when you change songs. You can also simply remove the swipe assignments and not assign any new actions to them to avoid accidentally triggering functions when swiping vertically to scroll lyrics.
- View a set list or a smart list to test your settings.
To trigger functions automatically when starting or finishing a song
- Open the Settings > App Control window and click Add An Action. Click the action you want to trigger, then click Layout Actions and select the song status you want to trigger it with. For example, to start a backing track whenever you select a song, click the Recordings > Start Recording action and select the Layout Actions > Song Selection trigger. You can assign multiple actions to the same trigger if you want to trigger several actions at once.
- The Song Selection trigger runs when you select a song, either by clicking its name in the song list, swiping between songs, using the Next/Previous buttons to change songs, using a foot switch or other remote control device, or auto-advancing with Settings > App Control > Auto-Advance Through Songs.
- The Song Auto-Selection trigger only runs when a song is selected with Settings > App Control > Auto-Advance Through Songs. You can use this to trigger functions when auto-advancing through a set list but not when selecting songs manually.
- The Song Second Selection trigger runs when you select the same song twice. This allows you to select a song once to view it, then select it again to trigger some actions. You can trigger some actions on the first selection and trigger other actions on the second selection. For example, you might want to send your MIDI presets immediately on the first selection, then look at the song for a moment before selecting it again to start a backing track.
- The Count Off Completion trigger runs at the end of a count off started by the Count Off app control action. You can use this to start a recording, start auto-scrolling or other actions after a count off.
- The Song Completion trigger runs when a song's recording, video or automation track ends, whichever is later. A recording must be more than one second long to trigger the song completion. If you don't play a recording, video or automation track for the song and Settings > Advanced > Trigger Song Completion From Duration is on, the trigger runs when the song duration is reached instead. You can use this to "clean up" after a song by stopping a tempo click, closing a full-screen document or opening the song list.
- You can automatically select the next song on song completion by turning on Settings > App Control > Auto-Advance Through Songs. When combined with a song selection action, this will auto-advance through an entire set. For example, if you're playing a backing track for each song, you can set the Start Recording app control action to Layout Actions > Song Selection. Then when a recording finshes, the app will auto-advance to the next song, and the selection of the next song will trigger Start Recording, and so on. See Auto-Advance Through Songs for more info.
- View a set list or a smart list to test your settings.
To control BandHelper with a Bluetooth device
Note: The Bluetooth devices mentioned here work like an external keyboard that you would type on, but with a small number of "keys." The buttons on a foot switch typically mimic the arrow keys on a keyboard.
Note: On iOS, in the Settings app, the Accessibility > Keyboards > Full Keyboard Access setting will interfere with foot switches and must be turned off.
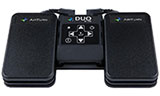
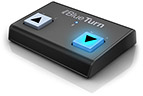
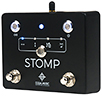
- Find out what keyboard messages your device can send. For example, the AirTurn
Duo sends up/down messages from the first two footswitches, and can send left/right messages from a second pair of switches. The iRig BlueTurn sends up/down messages with the default settings. The Coda Stomp sends left/right or up/down messages depending on the position of the Mode button.
- Open the Settings app on your iOS or Android device, navigate to the Bluetooth page, and pair your Bluetooth device.
- Open the Settings > App Control window and click Add An Action. Click the action you want to trigger, then click Foot Switch (Keyboard) Messages and select the keyboard message you want to trigger it with. For example, to select the next page of your lyrics when you send a down arrow message, click the Navigation > Next Page action and select the Foot Switch (Keyboard) Messages > Down Arrow trigger. You can assign multiple actions to the same message if you want to trigger several actions at once.
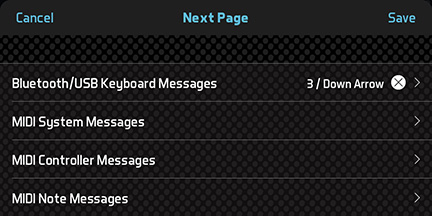
- When selecting a trigger, you can specify a double-click or hold gesture instead of the default click gesture. By selecting different gestures for different actions, you can trigger multiple actions from the same foot switch button. However, using a double-click gesture will delay the response to a click gesture with the same button by approximately a half second, because the app has to wait and see if a second click is coming.
- Instead of manually selecting the message trigger, you can click the Learn button after selecting an action, then send a message from your foot switch to select the trigger automatically. This is useful if your foot switch is connected and you're not sure what messages it sends.
- View a set list or a smart list.
- Use your Bluetooth device to send messages to BandHelper. BandHelper will respond with the actions you configured.
- If you don't get the expected results, click the App Control button (foot switch icon) in the top toolbar
 . If this button is not visible, you can show it by selecting Settings > Appearance > Top Toolbar Buttons > App Control. This button opens a status window. You should see messages that were received by the foot switch, and the actions they triggered, in the Activity Log. If the button at the bottom of the window says Keyboard Disabled, click it to turn on keyboard input.
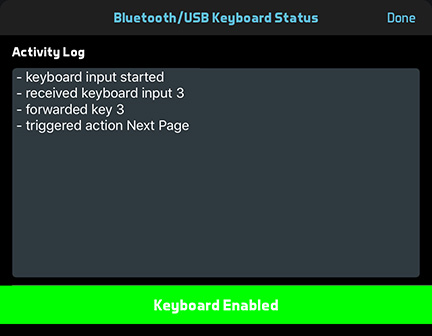
- Since most Bluetooth foot switches mimic a text keyboard, iOS won't show the on-screen keyboard when one is connected. BandHelper will automatically enable the remote keyboard connection when you view a set list or smart list and disable it when you have access to a text input field, but if you end up in a text input field with no on-screen keyboard, you might have to manually break the foot switch connection. Some foot switches have a button or a gesture (such as holding one of the buttons for a few seconds) to accomplish this; you can check your foot switch user manual for instructions. Alternatively, you can click the foot switch icon in the top toolbar and click the Keyboard Enabled label to disable it.
- Some AirTurn devices have an AirDirect mode that avoids conflicts with the on-screen keyboard on iOS. If you have an AirDirect-compatible AirTurn and switch it to this mode, you can click Settings > App Control > Set Up AirDirect AirTurn and turn on AirTurn Support. You should then pair your AirTurn device by selecting it in this window instead of in the iOS Settings app. If you do not have an AirTurn brand device, or it is an older AirTurn model that doesn't support AirDirect, or it is not in AirDirect mode, you should not use the Set Up AirDirect AirTurn button.
- You can connect multiple remote control devices and either map them to the same actions so that you can trigger actions from multiple locations on stage, or map them to different actions so you can trigger a larger set of actions. Most foot switches are configurable to send different keyboard messages. For example, you could have one two-button device configured to send up/down arrow messages and a second device configured to send left/right arrow messages, to control four different actions.
- BandHelper will only receive Bluetooth messages while it is the foreground app, unless you are using an AirTurn in AirDirect mode, which also works in the background.
To control BandHelper with a MIDI device
- Find out whether your MIDI device can send Start/Stop messages,
Song Select messages, Program Change messages, Controller messages
or Note messages. For example, the iRig BlueBoard can send control change messages, the Korg NanoKontrol can send continuous controller messages and the Alesis Sample Pad can send note messages.
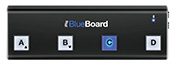
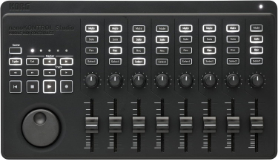
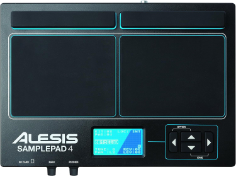
- Open the Settings > App Control window, scroll down to MIDI Input Channel and select the channel on which your controlling device will send messages. If you do not set a channel here, BandHelper will listen on all channels.
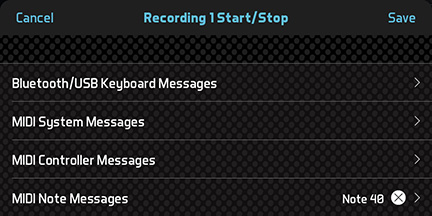
- On the same Settings page, click Add An Action. Click the action you want to trigger, then click MIDI System Messages, MIDI Controller Messages or MIDI Note Messages and select the MIDI message you want to trigger it with. For example, to
play the current song's recording by sending note
40, click the Recordings > Recording Start/Stop action and select the MIDI Note Messages > Note
40 trigger.
- When selecting a MIDI Controller or MIDI Note trigger, you can specify a double-click or hold gesture instead of the default click gesture. By selecting different gestures for different actions, you can trigger multiple actions from the same MIDI button. However, using a double-click gesture will delay the response to a click gesture with the same button by approximately a half second and using any hold gestures will delay the response to click gestures by approximately a second, because the app has to wait and see if a second click is coming. Also, gestures with MIDI Controller messages only work from momentary buttons that send a value of 64 or higher on press and 63 or lower on release, and Settings > App Control > MIDI Button Style must be set to Momentary.
- A few actions, like Scroll Document and Seek Recording, are triggered by MIDI Continuous Controller messages. This means instead of sending a single message from a button, you can send a series of values from a slider or knob on a MIDI controller, and the document scroll position or recording position will follow your movements. If you are using continuous controller messages, you should set Settings > App Control > MIDI Button Style to Latch to use the full range of values.
- Instead of manually selecting the message trigger, you can click the Learn button after selecting an action, then send a message from your MIDI device to select the trigger automatically. This is useful if your MIDI device is connected and you're not sure what messages it sends.
- View a set list or a smart list.
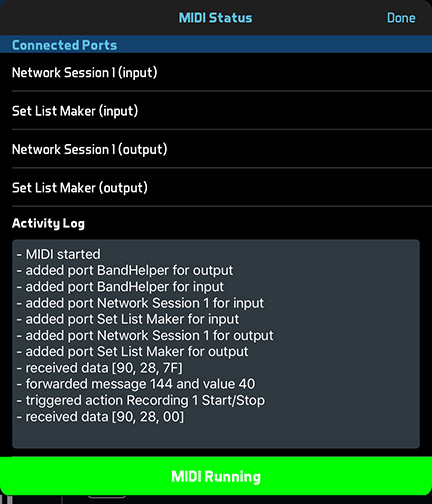
- The MIDI icon in the top toolbar should turn on to indicate that the app is ready to receive MIDI input:
 . If this button is not visible, you can show it by selecting Settings > Appearance > Top Toolbar Buttons > MIDI. Clicking this button opens the MIDI Status window. You can view connected ports and incoming MIDI messages in this window to test your connection.
- Use your MIDI device to send messages to BandHelper. BandHelper will respond with the actions you configured.
- BandHelper on iOS, by default, will only receive MIDI messages while it is the foreground app, but you can turn on Settings > Audio & MIDI > MIDI Options > Receive MIDI In Background to change this. This setting will only take effect if you exit the app while viewing a set list. Since an app running in the background uses more power than an app that is allowed to go to sleep normally, you should be careful to navigate out of a set list before exiting the app when you are finished using the app. On Android, BandHelper will generally receive MIDI messages in the background, but this is not guaranteed and it depends on the memory usage of the other running apps.
To select specific songs with a MIDI device
Most app control actions aren't tied to specific songs, but you can map MIDI messages to specific songs. Then if you have a MIDI device that makes it easy to send messages with specific values, you can use these messages to navigate directly to the desired songs.
- Find out whether your MIDI device can send Song Select messages or Program Change messages. Song Select messages were designed for exactly this purpose, but are limited to 128 songs, and are less commonly used.
- Open the Settings > App Control window and click Add An Action. Then click Navigation > Song Number.
- Click either MIDI System Messages or MIDI Program Messages, then select Song Select or Program Change. (These are the only options for each message type.)
- Open the Settings > Audio & MIDI window and turn on Assign Song Select Numbers or Assign Incoming Programs. You will need this to enter song values in the next step.
- Navigate to Repertoire > Songs and click a song to edit it. You'll see either a MIDI Song Number field or a MIDI Program Change field with accompanying Bank MSB and LSB fields. Enter unique values between 0 and 127 into these fields.
- Program your MIDI device to send the values you entered for each song.
- View a set list or smart list that contains the songs you want to select. Then send the messages you programmed from your MIDI device.
Alternatively, you can use a Song Select or Program Change message to select songs by their position in the set list view, by adding the Navigation > Song Number In Set List action on the Settings > App Control page. For example, you could send song number 4 to select the 5th song in the list (MIDI messages are numbered from 0), song number 10 to select the 11th song, etc.
To control BandHelper with another mobile device also running BandHelper
If you have BandHelper running on multiple devices, you can broadcast actions like selecting songs or changing pages from a lead device for the others to follow. Please see the Live Sharing tutorial for details.
Tutorials
 Getting Started
 Managing Users
 Maintaining Separate Projects
 Importing Data
 Synchronizing Devices
 App Editing
 App Shortcuts
 Notifications
 Adding Lyrics
 Attaching Documents
 Attaching Recordings
 Attaching Videos
 Building Set Lists
 Building Smart Lists
 Sharing Set Lists
 Practicing
 Performing
 Layouts
 Auto-Scrolling
 Automation Tracks
 Live Sharing
 App Control
 Sending MIDI or OSC
 Advanced Audio
 Scheduling Events
 Sharing Your Calendar
 Apple Watch Interface
 Managing Contacts
 Tracking Finances
 Building Checklists
 Building Stage Plots
 Sharing Files
 Logging Practice Time