
Scheduling Your Band's Events
BandHelper includes a calendar for keeping track of your events, with some extra features especially useful for booking shows. You can watch a demo video, or read on for more details.
- Click Schedule in the main menu, and you'll see your existing events either in a list format or a calendar format. You can change the display format with the List View and Calendar View buttons in the left sidebar.
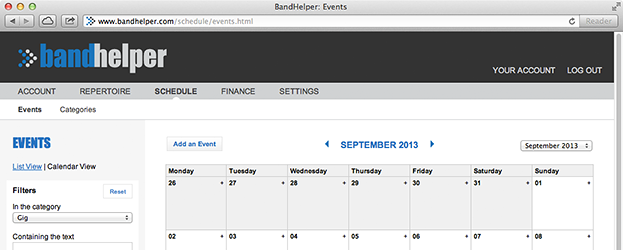
- Click the Add an Event button (or from the calendar view, the + icon on one of the calendar days), and you'll see the Event Edit page.
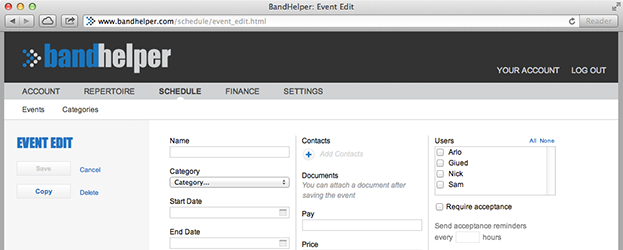
- Enter a name for the event, and set the category to Show. You can also schedule rehearsals or band member vacations, and you can define your own categories in Schedule > Categories.
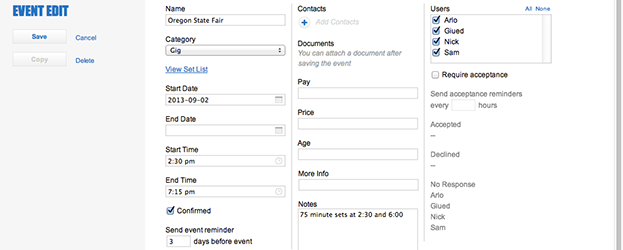
- Enter a date and time for the event, and an optional end time. For events that last multiple days, like a band member vacation or a recording project, you can enter a separate end date. For events that end at midnight, you'll have to enter the next day as the end date, but it will only display on the calendar as a single-day event.
- If you wish, you can click Add Contacts and select a contact from your Contacts list. (You can add a new contact from the Add Contacts popup window if needed.) The BandHelper app will then show icons to quickly call the contact's phone number or show the location on a map.
- You can also enter the expected pay for the event and any additional notes or custom field values.
- Select the users affected by this event. A performance with your entire band would include all users; a personal vacation would just include one user; and a small ensemble gig or side project might only include a few users. Everyone in your band will still see all the events, unless they use the Includes Me filter on the Schedule page to hide events that don't include them.
- If you want your bandmates to receive a notification when you save the event, click the Confirmed checkbox. See below for more information about this option.
- If you want your bandmates to receive an automated reminder before the event, enter a number of days into the Send Email Reminders field or a number of hours into the Send SMS Reminders field, and BandHelper will send them a notification with the event details. You can use both fields to send, for example, an email reminder a week before an event and an SMS reminder a few hours before an event.
- Click Save, then click Events in the submenu and you should see your event listed.
You might want to add a potential event to your schedule right away, but show that it is not yet confirmed while you work out the details with the venue or booking agency.
- If an event is not finalized yet, you can leave the Confirmed box unchecked on the Event Edit page. This event will then appear in italics, and users can hide it by clicking the Confirmed filter on the Events lists.
- When the event is finalized, you can edit the event, check the Confirmed box and save the event. BandHelper will then send confirmation messages to each user selected for the event.
- When confirming an event, you can optionally check the Include Contacts option under the Confirmed checkbox. BandHelper will then send a simplified version of the confirmation message (without the Pay, Notes, custom fields or documents) via email to all the contacts attached to the event. Because of the possibility of spam filters blocking unknown senders, you should not expect this function to replace the direct communication you have with your clients, but it can be a useful additional confirmation for their records.
- Sometimes you'll add details to the event later, like changing the start time or adding a soundcheck time to the notes. You can alert your bandmates to these changes. Edit the event as needed, then check the Send Update box, and enter a comment that briefly describes the changes (e.g., "new start time"). BandHelper will re-send the event confirmation email with your comment at the top.
Usually before you can confirm a gig, you have to talk to your bandmates first to make sure they're available. BandHelper helps automate that process.
- On the edit page for an event, click the Require Response checkbox. Some new fields become active.
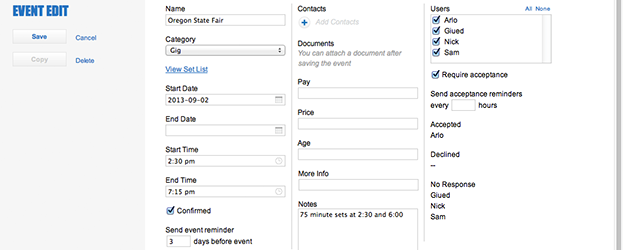
- The Accepted, Declined and No Response lists show who can or can't participate in the event and who hasn't responded yet. Initially, nobody has responded because you haven't sent your request yet.
- Click the Save button and BandHelper will prepare a request notification to each user selected for the event. The message won't be sent for 10 minutes, so if you add more events in that time, they will be bundled into a single notification message. The message will contain event details, and buttons labeled Accept, Maybe and Decline. These response buttons will also appear on the event edit page.

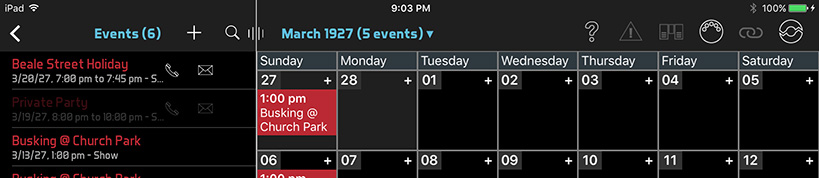
- When users view the events list or calendar in BandHelper, any event waiting for their response will include an alert icon. They can also reply by viewing that event and clicking one of the response buttons there.
- If your bandmates don't reply to your event requests, BandHelper will automatically resend them five times, on an interval specified by the Send Action Item Reminders setting on the user edit page. Only users who have not yet responded will receive the reminders.
- Whenever a user clicks Accept, Maybe or Decline, the users in your account that you've designated as administrators will receive an email message containing the event details and a list of each user's response. That email message also includes a button to confirm the event, so when enough users have responded that you can go ahead and book the event, you can click the Confirm button to show that it is booked. This will stop the reminder notifications, although any user who still hasn't responded can still respond.
Proposing Multiple Date/Time Options
- If you want to request availability for a few date/time options, you can click Add a Date/Time Option and enter additional sets of date/time info, then click the Require Response checkbox. Then users will see a separate set of response buttons for each date option, and you can view the individual responses for each option.
- When an event has multiple date options, each of the date options will appear in the Events list and calendar view, but clicking any of them will edit the parent event.
- When you see a consensus for one date option, you can edit the event, click Use This Option and click Confirmed. The other options will be deleted and users will be notified of the final date and time.
- You cannot confirm an event while it has multiple date options, or add date options to a confirmed event. You can confirm an event after selecting a date option.
- You cannot set up repeats for an event while it has multiple date options, or add date options to a repeating event. You can set up repeats for an event after selecting a date option.
- Multiple date options are not a substitute for repeating events. You should use multiple date options when you want to schedule one event but don't know the best date and time for it. You should use repeats when you want to schedule several events on a regular interval.
- You can create repeating events with the repeat options on the event edit page. Copies of the event will automatically be created when you save an event using these options. If you change the repeat options for the original event, all future copies will be deleted and recreated with the new settings, while past copies will be left alone. If you make other changes to or delete any event in the series, that event and all the events after it will be updated or deleted, while events before it will be left alone.
- In most cases, BandHelper will only show info for one project at a time. But on the events list and calendar pages, you can select the Include All Projects filter to show the events for all your projects together. This can make it easier to avoid conflicts when scheduling new events. Events for other projects will not be editable in this case; you will still need to switch to the other project to edit them.
- Email notifications for events will include some basic event info, including your custom fields, and a list of documents if any are attached to the event. The document names will link to the event page on the website, which requires a login. The documents will not appear for users who don't have access to them.
- In order to keep each users' schedule private from the others, you can turn on the Personal Schedule Only option on the user edit page for each person but the band leader. Then those band members will only see the events they are included in.
- If you cancel an event after adding it to BandHelper, you could simply delete it, but that might confuse band members who already saw it on the schedule. Instead, you can edit the event and select the Cancelled checkbox. It will then remain on the calendar, but in a faded style. You can optionally check the Include Contacts option under the Cancelled checkbox to send a simplified version of the cancellation message (without the Pay, Notes, custom fields or documents) via email to all the contacts attached to the event.
Tutorials