
Getting started
This tutorial is oriented toward band leaders who are setting up an account. We also have a Getting Started for Bandmates video tutorial that focuses on using BandHelper after the band leader sets it up.
You can start using BandHelper by adding some songs to your account. Then add an event to your calendar, and create a set list for that event. This tutorial shows the website because using the website from a computer is the most efficient way to enter data, but if you only have access to a mobile device you can also do all these tasks there.
- When you log into BandHelper, you'll see a main menu across the top of the page with an item for each section of the product. When you click a main menu item, the submenu will change to show the specific pages for that section.
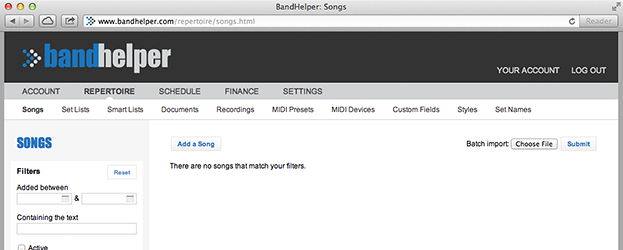
- Click Repertoire in the main menu, then click Songs in the submenu, and you'll see an empty song list.
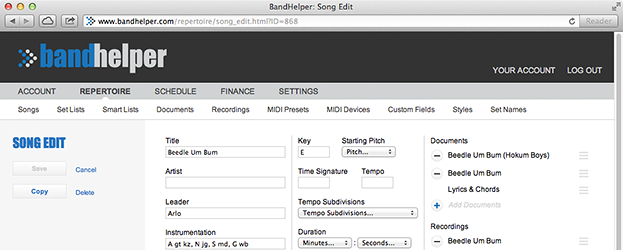
- Click Add a Song, and you'll see the song edit page. Enter a song title and some other info (only the title is required), then click Save.
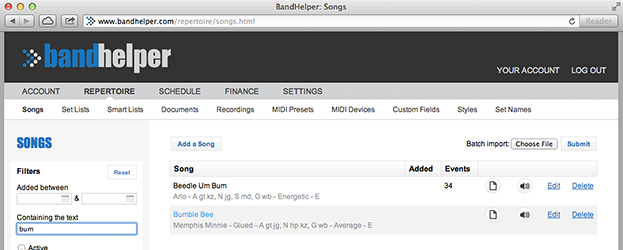
- Click Songs in the submenu to return to the Songs list, then repeat the last step with a few more songs.
- Return to the Songs list again, and notice the Filters box in the left sidebar. You can set these to search your song list. You can also click headings in the song list to sort it. Click the Reset button in the filters box to show the complete list again.
You'll probably want to add a lot more songs. You can continue adding them manually as shown above, or look at the options for importing data. For now, let's move ahead and add our first event.
Note: The Events module is only available in Plus and Pro accounts. If you have a Basic account, you can skip to the next section.
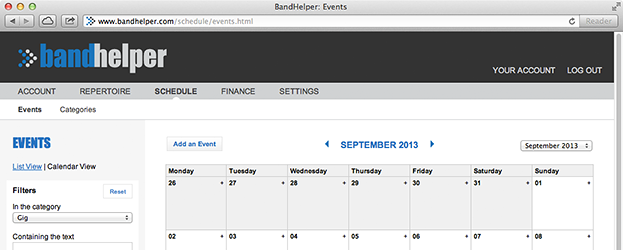
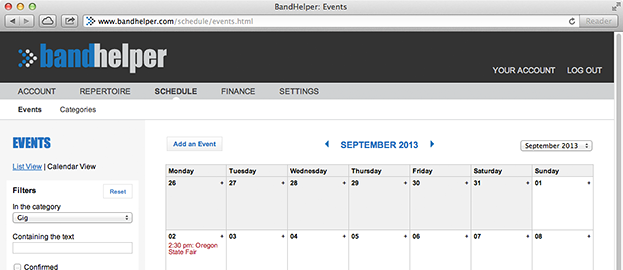
- Click Schedule in the main menu, and you'll see an empty event list. Above the Filters box, you'll also see options to show events in list view or calendar view. Click Calendar View and the list will change to a calendar.
- Click the + icon on one of the calendar days, and you'll see the event edit page.
- Enter a name for the event (typically, the venue name, for gigs), and set the category to Show. The start date is already set based on the calendar day you clicked, but you can add a start time and optionally an end time. Select the users to include in the event, then click Save.
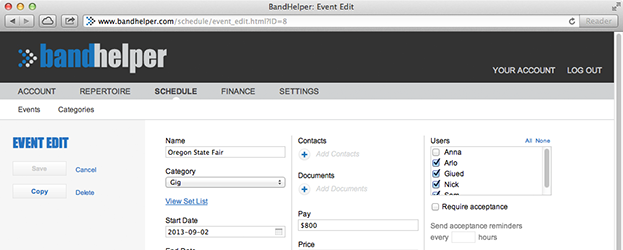
- Click Events in the submenu and you should see your event on the calendar.
Now that we have a gig scheduled, let's make a set list for that gig.
Making a Set List for an Event
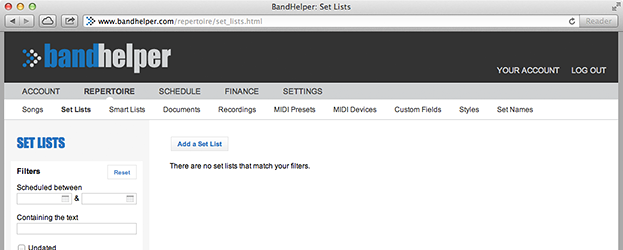
- Click Repertoire in the main menu, and you'll see an empty list of set lists.
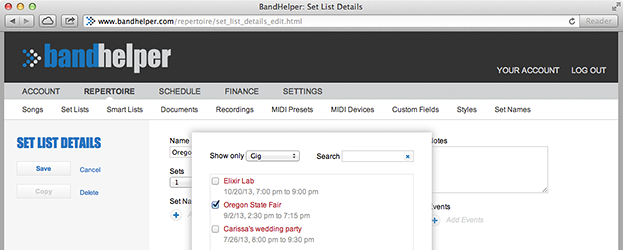
- Click Add a Set List, and you'll see the set list details page. Enter a name. Do not include the date of the event in the name; we'll handle that separately in the next step.
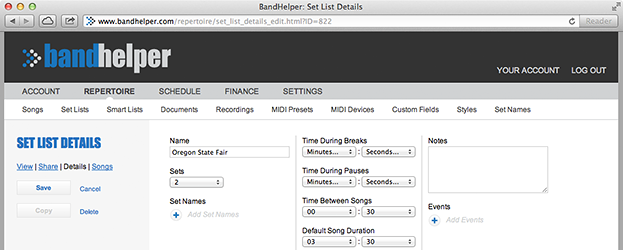
- In Plus or Pro accounts, click the Add Events button and a popup window will appear showing your scheduled events. Select the event you just created and click Save in the popup window. In Basic accounts, you can enter the event date and time directly onto this page. Then click Save.
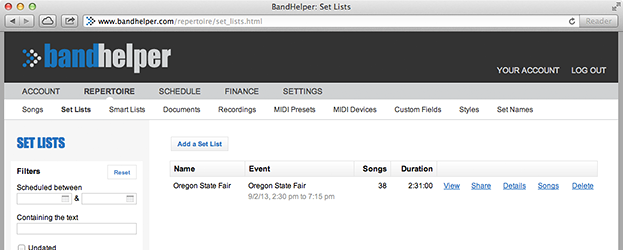
- Click Set Lists in the submenu and you should see your new set list, with the date of the event that you attached it to.
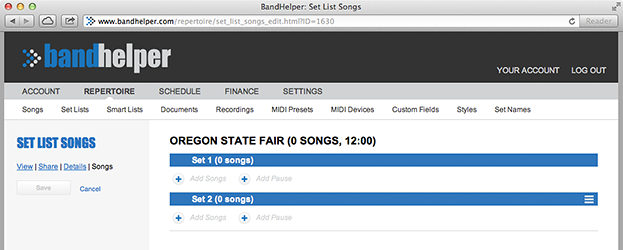
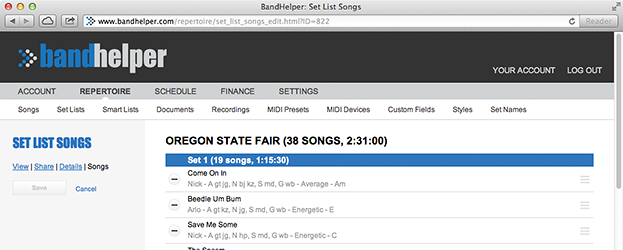
- Click the Songs button to the right of the set list, and you'll see any empty song list with an Add Songs button.
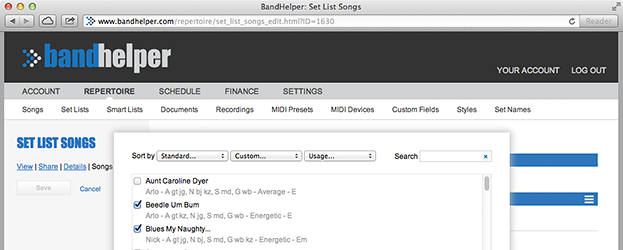
- Click Add Songs, and a popup window will appear showing your songs. Select all of your songs, then click Save in the popup window.
- Now your songs appear in the list in the main window. Adjust the song sequence by dragging the "grip" icon to the right of each song. When you're finished, click the Save button to save the sequence.
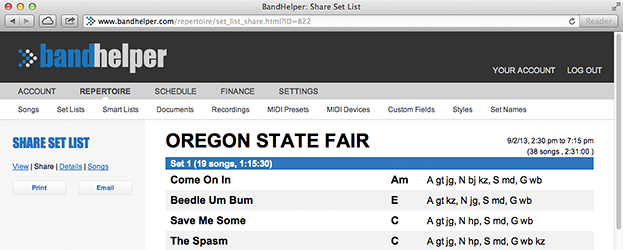
- In the left sidebar, click the Share Set List button to see a print-friendly version of your set list. From this page, you can click Print or Email to share it with others … but if your bandmates also log into BandHelper, they can view the set list themselves and print it if they need to.
Here are some additional notes about your set list:
- Any time you want to adjust the song sequence, you can click the Songs button for the set list and continue rearranging the songs.
- If you want to use the exact same set list for a future event, you can click the Details button for this set list and add the new event to the Events list. If you want to use a slightly different set list, you can click the Details button, then the Copy button, to make a new set list based on this one, then make any desired changes to the new set list.
- You don't have to link a set list to an event. Sometimes you'll want to create a general set list with no specific event in mind, like a master list, a practice list, etc. Set Lists that aren't linked to events will appear in alphabetical order at the top of your list of set lists.
- For more options with set lists, you can proceed to the Building Set Lists tutorial.
Now that you've set up some data, you can switch to the mobile app to view it. Here are some notes about using the BandHelper apps:
- BandHelper is available as a mobile app for iOS, macOS or Android devices. These apps are free to download and use as long as you have a current BandHelper subscription. Just download from the Apple, Google or Amazon (for Kindle) app stores, click Log Into An Existing Account and enter your login information. You can add or edit data on the website or in the apps and changes will sync between them automatically.
- You can follow the Performing tutorial to learn about rehearsal and performance functionality that's only available in the apps.
- The documentation often includes navigation paths starting with the Repertoire button, but if you have a Basic account, the app might open to the Repertoire module automatically. If you see a menu starting with All Songs, Set Lists, Smart Lists, you are in the Repertoire module.
- If you're not sure what a button or setting does in the apps, you can click and hold it to show in-app help. If you're not sure where in-app help is available, you can click Help > Show Hint Icons and look for the small question mark icons above toolbar buttons and app settings.
Tutorials