
Building set Lists
The basics of making set lists are covered in the Getting Started tutorial, but set lists have some additional capabilities. You can watch a tutorial video, or read on for more details.
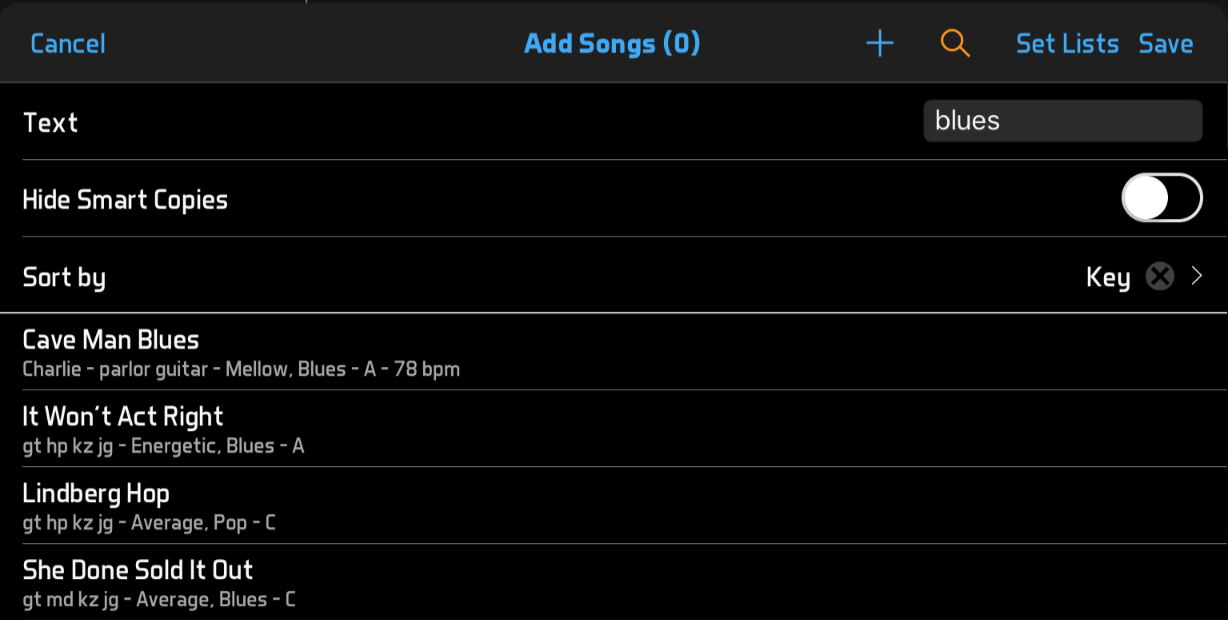
- From the set list's Edit Songs page, you can click the Add Songs button to add songs to the set list. In the Add Songs popup window, you can click the search button to search or sort within your complete song list. For example, you could sort by key to make it easier to pick songs with a variety of keys; or you could search to quickly find a particular song.
- You might want to duplicate a portion of an older set list without copying the entire set list. In that case, you can click Set Lists at the top of the Add Songs window, then select an older set list. The contents of that set list will load into the Add Songs window, and then you can select any sequence of songs from that set list. The songs will be added to your current set list in the order in which you select them.
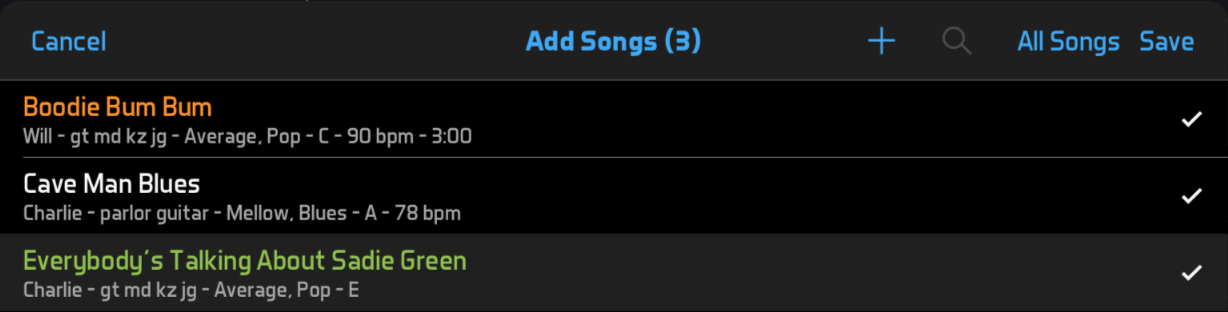
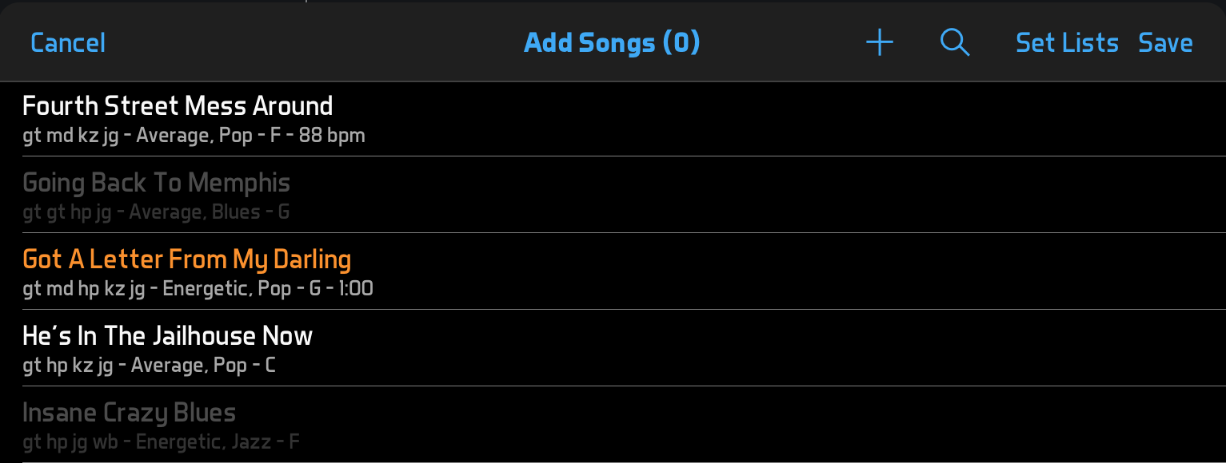
- In the Add Songs window, songs that are already in the set list will be faded in the song picker. However, you can still select the faded songs if you need to add the same song to the set list multiple times.
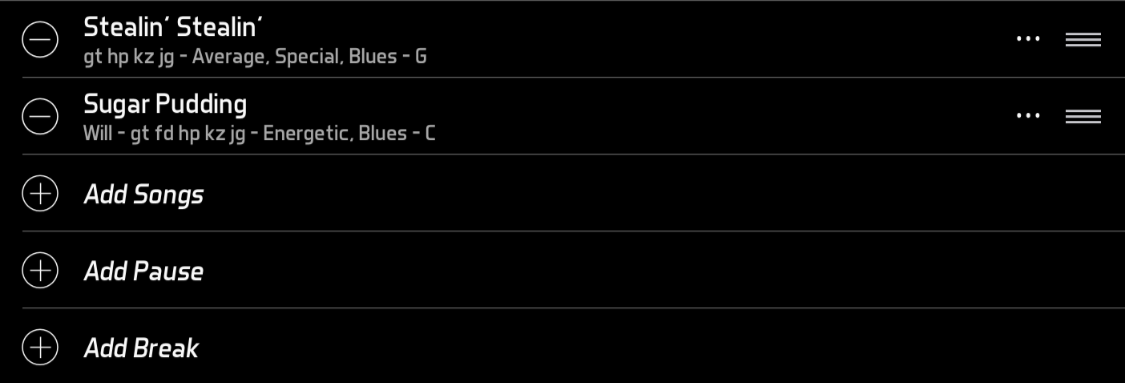
- After adding songs, you can rearrange them by dragging the "grip" icon (three lines) on the right end of each song. On Android, you will need to hold this icon for a moment until the song detaches from the list, then drag it.
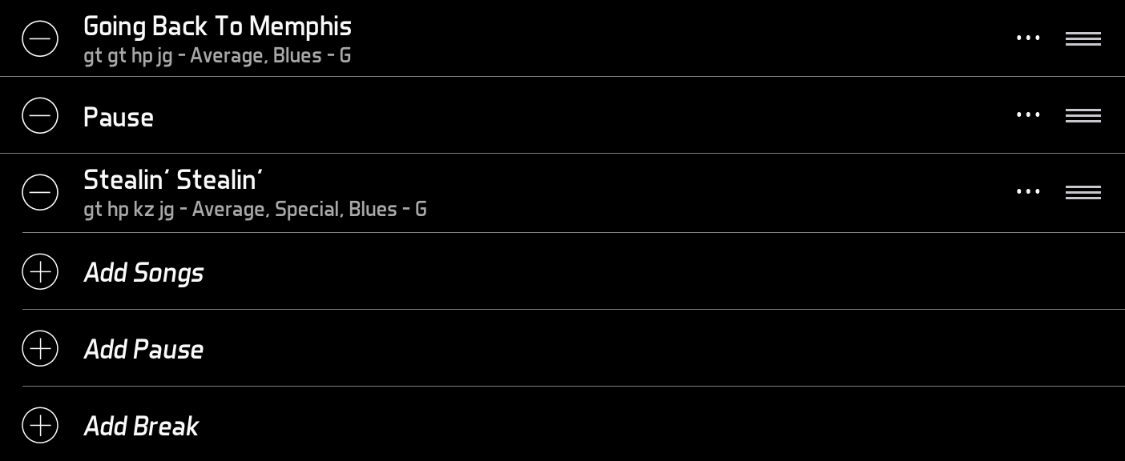
- A set list can consist of multiple sets. To divide your set list into sets, click Add a Break; that will add a set break with a new set after it. You can click each set's Add Songs button to add songs to the desired set, but you can also drag songs from one set to another if you change your mind about what set to place a song into.
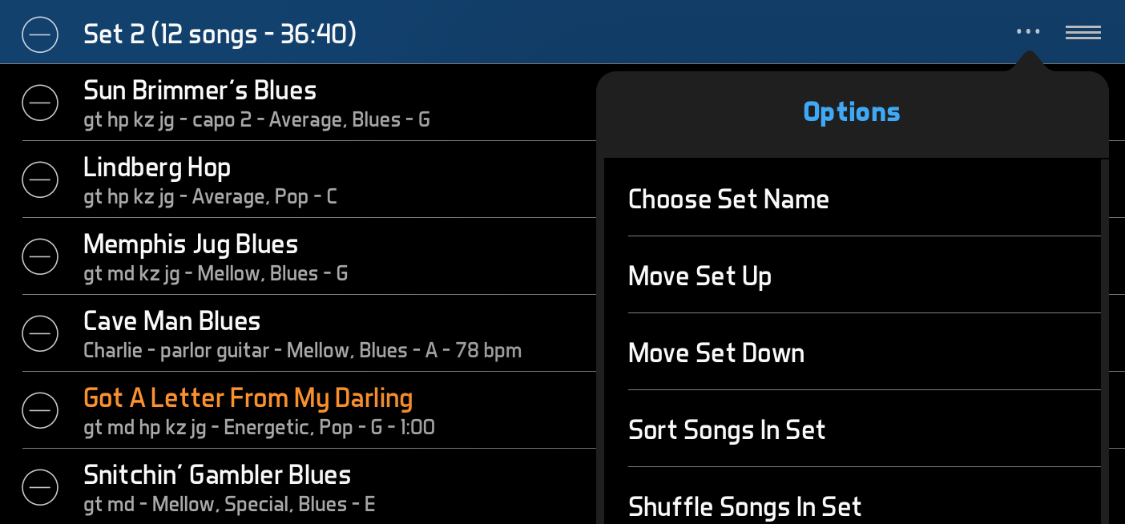
- If needed, you can rearrange the order of the sets by clicking the options button (three dots) on a set heading, then clicking one of the options to move the set. (This menu also includes options to sort or shuffle the songs in the set.)
- Similarly, instead of dragging songs from one set to another, you can click the options button (three dots) on a song, then click one of the options to move it to a different set.
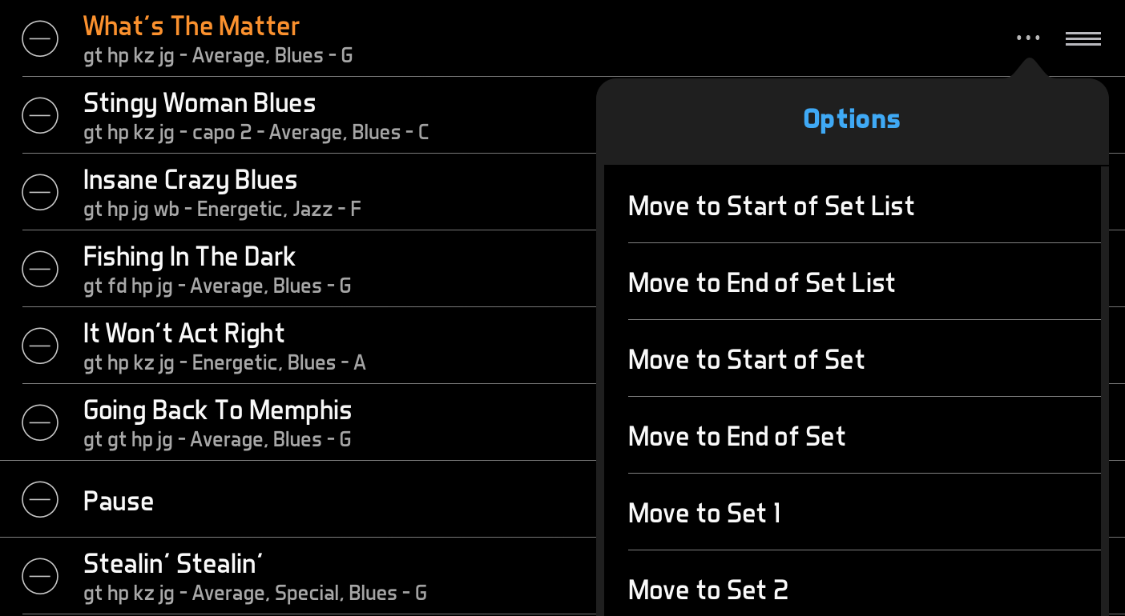
- From the options button (three dots), you can also choose the Move Multiple Items option, then follow the prompts, to select multiple songs and move them together.
- To indicate songs that you want to play together as a medley, or with minimal time between, you can click the Link Songs button, then drag the link into the desired position. Then when you view the set list, an icon will appear indicating the songs that should be run together.
- To change some of the info in a song just for a particular set list, you can go back to the Repertoire > Songs page, edit a song, click its Copy button and choose to option to make a smart copy. Then change some fields in the smart copy, and the fields you don't change will inherit from the original copy even if it changes. Then you can add the smart copy to a set list. If you decide later that the smart copy is no longer needed, you can delete it from the Repertoire > Songs list, and BandHelper will automatically replace it with the original copy in your set lists.
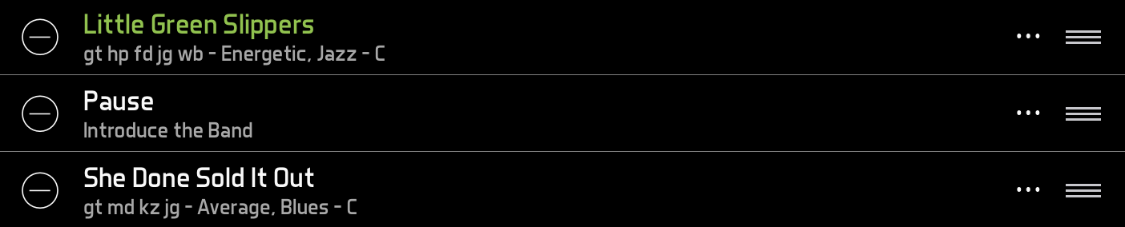
- To indicate a place in a set where your band will change instruments or make announcements, you can click the Add a Pause button, then drag the pause into the desired position. If your band plays a lot of medleys, you could use pauses to indicate the end of a medley. Or if you use auto-played backing tracks, you can use a pause to stop the auto-play until you trigger the next song manually.
- By default, BandHelper labels your sets with the simple names Set 1, Set 2, etc. You can customize these by entering your own set names. A typical use for this is to add a final set in your set list, name this final set Extras and add a few extra songs that you can pick from if your set list runs short. In this case, you could turn on Exclude From Total Duration for the set name so that these extra songs don't affect the set list duration calculation. To add a custom set name, go to Repertoire > Set Names and click the add button. To apply a set name to a set, go to the set list's Edit Songs page, click the options button (three dots) on a set heading and click Choose Set Name.

- You can also add custom names for pauses. For example, you can designate a spot in the set list to stop and introduce the band. You can also enter extended notes along with the pause name, and the notes will appear in the document area of your layout when you reach the pause. When calculating the total set list duration, BandHelper will use the pause duration defined in the set list, but you can override that for specific pauses on the pause name edit page if you want to have pauses of varying lengths included accurately in the totals. To add a custom pause name, go to Repertoire > Pause Names and click the add button. To apply a pause name to a pause, go to the set list's Edit Songs page, click the options button (three dots) on a pause and click Choose Pause Name.
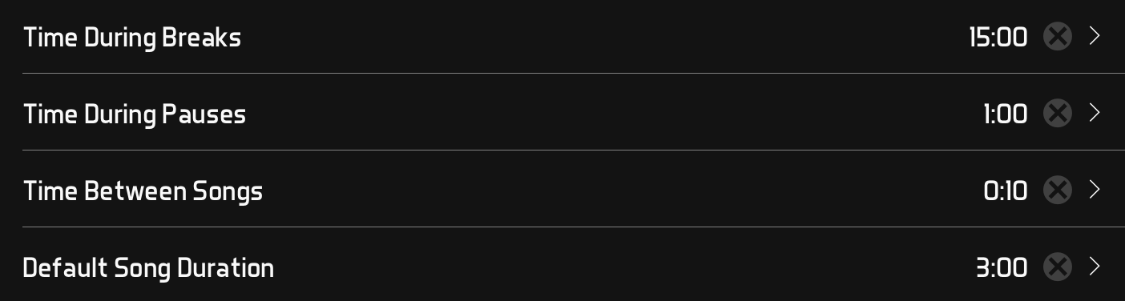
- BandHelper can calculate the duration of your complete set list and of each individual set, but you have to define the duration of each of your songs on the song edit pages. If you forget to set the duration for a song, BandHelper will use the default song duration defined on the set list's Edit Details page, so it's a good idea to set that as a fallback. You can also set an account-wide default song duration on the Settings > General page, and then any new set lists you create will use that duration. With these defaults in place, you can still set different durations for specific songs as needed. You can also set a time during breaks, a time during pauses and a time between songs to make the total duration more accurate.
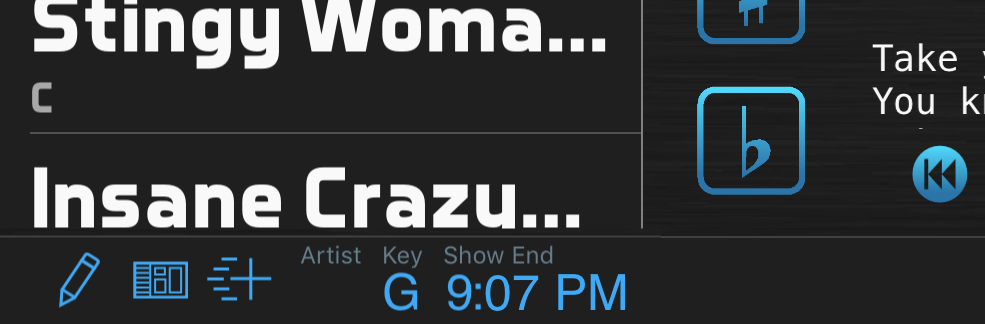
- Besides calculating the duration of your set list while you're creating it, BandHelper can also calculate the projected end time while you're performing it. You'll need to edit one of your layouts to add one or more time-related fields like Remaining Show Duration or Projected Show End Time. Then as you select the songs in your set list, these fields will update to help you target a specific end time for your show.
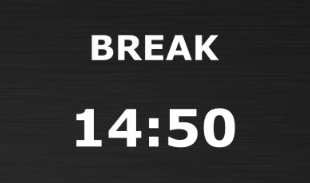
- BandHelper can also help you keep your break times under control. You can turn on Settings > Appearance > Break Timer, and make sure your set list has a setting for Time During Breaks. Then when you reach a break in your set list, BandHelper will show a countdown timer. When it gets to 0, it will turn red and show negative numbers to remind you and your bandmates to get back to work.
- If you have a BandHelper Basic account, you can enter a date, time and contact info for a set list on its Edit Details page. If you have a Plus or Pro account, you can attach an event to a set list, and attach contacts to the event. (The expanded structure of Plus and Pro accounts allows you to use the same set list or contacts for multiple events without entering the same info repeatedly.) Then when you view the list of set lists, you'll see a divider line, with undated set lists above the line, sorted by name, and dated set lists below the line, sorted by date.
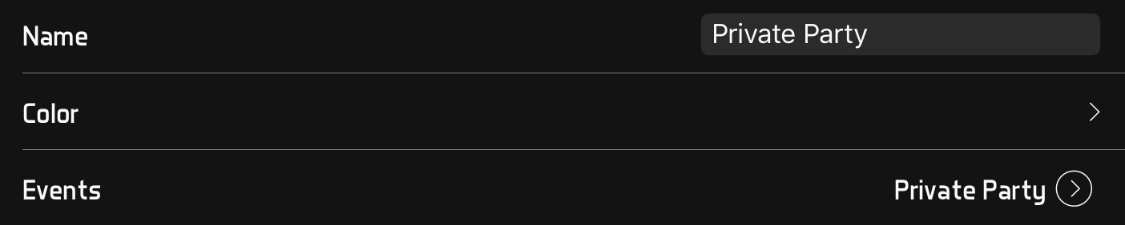
- Dated set lists will naturally move down on the list as they get older. If you have an undated set list that you don't need to see at the top of the list but don't want to delete, you can archive it by giving it a date. In a Basic account, just set the Date field on the Edit Details page. In a Plus or Pro account, click Events, then click the Add Event button. You can leave the default name, or enter a more general name like "Archived Set Lists" if you want to archive mulitple lists to the same date. Then set the date, and set the users, typically to All. To archive additional set lists to the same date, you can go to the Edit Details page for another set list, click Events and select the archive event you already added.
- To give your bandmates quick access to a commonly used set list, you can select the star icon on the list of set lists to mark it as a favorite. It will then appear on the main menu of the app. Set lists for upcoming events will appear there automatically; you can control how many from Settings > Appearance > Main Menu Shortcuts > Set Lists. Viewing a set list from a shortcut will open it with the default (last-used) layout, bypassing the options to edit or share the set list. You can change layouts using the Layouts button in the top toolbar of the set list view, but to edit or share the set list, you will need to navigate to Repertoire > Set Lists > [set list name].
- To quickly switch between set lists and smart lists without leaving the set list view, you can select the triangle icon on the list of set lists to mark it as a title shortcut. Then in the set list view, you can click the title in the top toolbar to choose from your list of title shortcuts. This is much faster than navigating back to the full list of set lists or smart lists and then back into the set list view.
Tutorials