
Managing your music contacts
BandHelper is a great place to keep track of contact information for venues, promo outlets, tech personnel or other performers. You can attach contacts to your events for quick access, or schedule reminders to follow up with your contacts on booking or promo efforts. You can watch a demo video, or read on for more details.
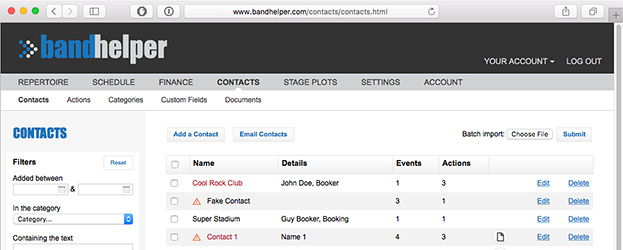
- Click Contacts in the main menu, and you'll see your existing contacts if you've entered any.
- Click the Add a Contact button and you'll see the Contact Edit page.
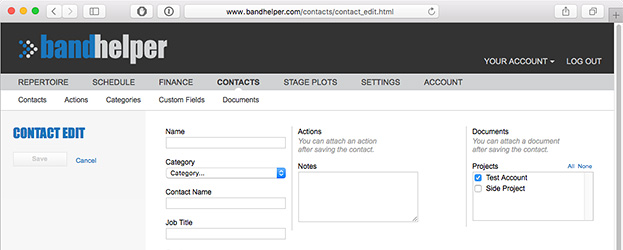
- Enter the name of the contact (a business or a person), a contact name and job title (for a person within a business) and other info as needed. You can define your own categories in Contacts > Categories.
- Click Save, then click Contacts in the submenu and you should see your contact listed.
If you have a large number of contacts to enter at once, you can perform a batch import from the Contacts list. More details are in the Importing Data tutorial.
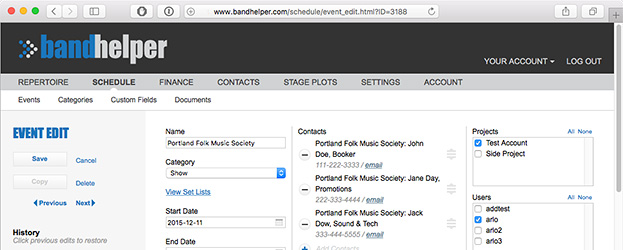
Attaching contacts to an event
If you attach contacts to an event, you can quickly access their info whenever you view the event. This includes buttons in the iOS and Android apps to make a phone call, send a text message, address an email message or open a map with a single click.
- If you are creating a new event for an existing contact, you can navigate to the Contact Edit page, then click the Add an Event link. This will take you to a new Event Edit page, with the contact already attached.
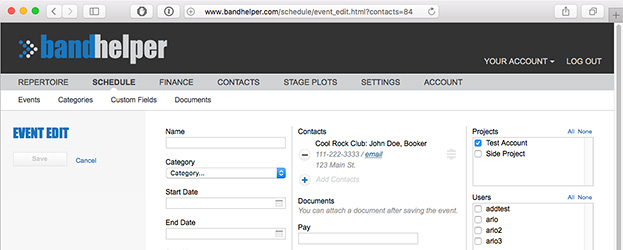
- If you have already created an event and want to attach contacts later, navigate to Schedule > Events and click the Edit button for an event. Then click the Add Contacts button, select the desired contacts from the list, and click Save.
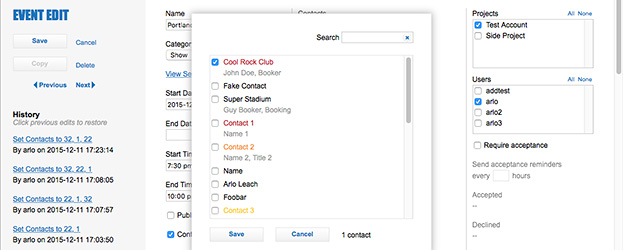
- You can attach multiple contacts to an event; for example, you might have booking, promo and tech contacts for a performance. If needed, you can drag and drop to rearrange the attached contacts on the Event Edit page.
Tracking interactions with your contacts
BandHelper can help you remember past interactions with your contacts, and remind you when you need to follow up in the future. For example, you could log the date you sent a press kit to a venue, then schedule a follow-up for two weeks later.
- From the Contact Edit page, you'll see an empty list of actions. Click the Add Action button to open the Action Edit page in a popup window.
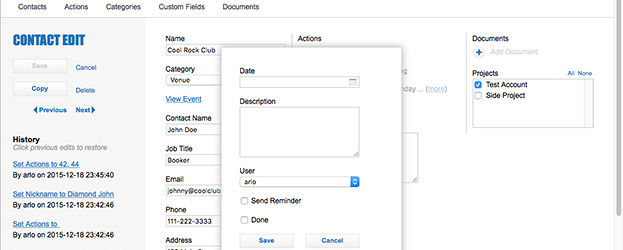
- Enter a past or future date, and enter a description of the action. This could be something like "sent press kit" or "follow up on news article." If this is a future action and you would like BandHelper to email you a reminder the day it is due, select the Send Reminder checkbox, then click Save. Now the action will appear on the Contact Edit page.
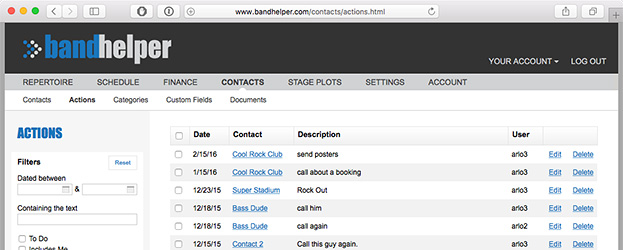
- To review all your past or future actions, navigate to the Contacts > Actions page. You can set a date range or use the To Do filter to show only actions that still need to be done.
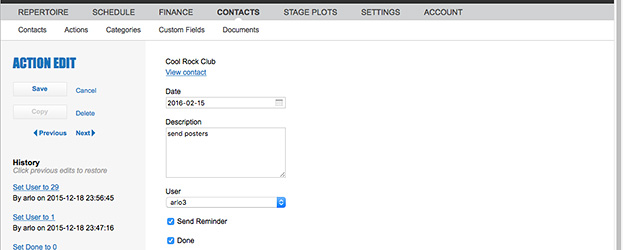
- After you finish a scheduled action, you can click the Edit button for the contact and select the Done checkbox. Then BandHelper will show it as done and will not send a reminder about it.
- If you request reminders for upcoming actions, BandHelper will send no more than one message a day summarizing the actions due on that day.
- If you are using the website widget to display your events on your band website, the display will include the address of the first contact attached to an event. You can reorder the contacts on the Event Edit page if needed to include the correct address on your website.
- If you don't want to share your entire contact database with your bandmates, you can turn on the Event Contacts Only option for users in your account, and then those users will only see the contact info for their events.
Tutorials