
Tracking Your Band's Finances
If you log all your band's financial transactions -- income and expenses -- into BandHelper, it can calculate your total earnings and help you distribute the earnings fairly among your bandmates.
Tracking finances in BandHelper is similar to tracking finances in typical accounting software, especially if your band strictly deposits all income into a bank account and pays all members from that bank account. But many bands exchange money more directly, with some combination of cash, checks and electronic payments. BandHelper can formalize that approach by tracking all amounts that have been exchanged or are still owed between band members.
For example, if the band leader receives a gig fee as a check, BandHelper will show that some of that is owed to the other band members who played that gig. The band leader can pay them in full at the gig to balance the ledger immediately, but in some cases the band leader will distribute some or all of that income later: maybe he or she wants to pay the other band members in cash but doesn't have enough cash on hand at that moment; or has enough cash but wants to round to the nearest $20 for convenience; or one of the band members left before the money was divided. In all those cases, BandHelper will keep track of whatever money is still owed so band members can settle up eventually and see exactly what they have earned.
BandHelper can also manage band income that you set aside to fund a future project or pay for equipment or other shared expenses, and it can generate and track invoices for clients who require them.
You can watch a demo video, or read on for more details.
Note: If you're not using funds (bank accounts or other savings mechanisms), you can ignore all the references to funds, deposits and withdrawals below.
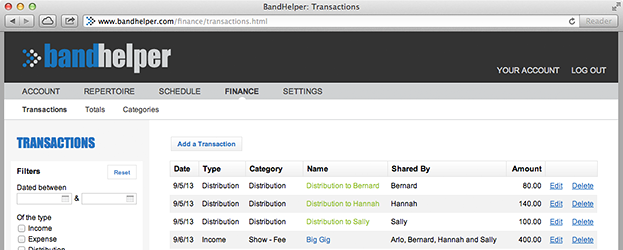
- Click Finance in the main menu, and you'll see your existing transactions if you've entered any.
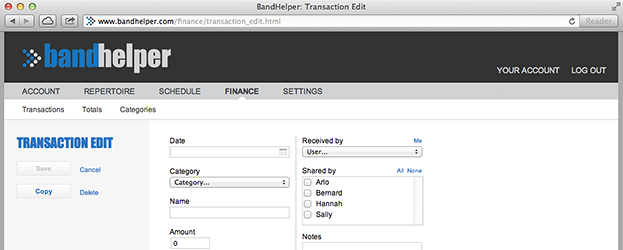
- Click the Add a Transaction button and you'll see the Transaction Edit page.
- Set a transaction type, which determines how the transaction behaves. The possible types are:
- Income: When your band earns money from any source, you can log it as income. If you receive different kinds of income at an event (fee, tips, merch sales) and want to track those separately, you can enter separate income transactions, setting a different category for each.
- Expense: When your band spends money for any shared purpose (renting equipment, buying merch, printing posters), you can log that as an expense.
- Distribution: A distribution is a transfer of income from a band member or a fund to the band member who earned it. For example, when the band leader receives a gig fee from a venue and then gives each band member their share of it, you can log that as a distribution.
- Deposit: A deposit is when a band member adds band earnings they've been holding to a fund. For example, if the band leader deposits a portion of a gig fee into a bank account, you can log that as a deposit. A deposit could also be a contribution of band members' own money toward an upcoming expense.
- Withdrawal: A withdrawal is when a band member takes money from a fund to use for expenses. For example, if the band leader withdraws cash from a bank account to pay for some expenses, you can log that as a withdrawal.
- For Income or Expense transactions, set a category, which allows you to search for different kinds of income or expenses. For example, you could look up how much your band has earned from tips. You can define your own categories on the Finance > Categories page.
- Enter the date of the transaction, a name that describes the transaction (e.g., "CD sales") and the amount of money involved.
- The next few fields will vary depending on the transaction type:
- Income: If someone is personally holding this income before paying it out, even if just for a few minutes, set Received By to that person. That will increase the amount that person owes to the other band members. On the other hand, if this income is immediately deposited into a fund, set Deposited To to that fund. If the fund is designated as a savings fund, that will increase the amount of savings attributed to the band members; otherwise, it will increase the amount owed to all the band members. In either case, set Shared By to the band members who are entitled to a share of the income (e.g., for a gig fee, the members who played the gig).
- Expense: If someone is paying for this expense with their own money and will need to be reimbursed, set Paid By to that person. That will increase the amount the other band members owe that person. On the other hand, if the expense is paid directly from a fund, sent Paid From to that fund. If the fund is designated as a savings fund, that will decrease the amount of savings attributed to the band members; otherwise, it will decrease the amount owed to all the band members. In either case, set Shared By to the band members who are sharing that expense (e.g., for a PA rental, the members who played the gig).
- Distribution: Set Paid By if band members are receiving money that another band member has been holding, or set Paid From if band members are receiving money stored in a fund. Then set Received By to the bandmates who are receiving the money. That will decrease the amount owed to the receivers.
- Deposit: Set Paid By to the person who's adding money to a fund. Set Deposited To to the fund they're depositing into. If the money is band income that the depositor was holding, set Shared By to the band members who are entitled to a share of the income. If the fund is designated as a savings fund, that will decrease the amount that is owed to those people and increase the Savings amount attributed to them. On the other hand, set Shared By to the same person as Paid By if they are depositing their own money. That will only increase the savings amount attributed to that person.
- Withdrawal: Set Received By to the person who's taking money from a fund. Set Withdrawn From to the fund they're withdrawing from. If the money will be used for band expenses, set Shared By to the band members who are sharing that expense. If the fund is designated as a savings fund, that will increase the amount that is owed to those people and decrease the Savings amount attributed to them. On the other hand, set Shared By to the same person as Received By if they will keep the money as earnings. That will only decrease the savings amount attributed to that person.
- By default, transaction amounts are shared equally by the selected users. To override this, you can enter amounts for individual users in the Shares section after the list of users. For example, you might pay some band members more or less for a gig or ask some band members to contribute more or less toward an expense. These shares must add up to the total amount before you can save. You can enter numbers with three decimal places if needed. To return to equal shares, you can click the Defaults button in the Shares section.
- Click Save, then click Transactions in the submenu and you should see your transaction listed.
Repeat these steps as needed. In many cases, you will log several transactions at a time. For example, after a performance you might log one transaction for the fee paid by the venue, another for tips received and a third for merchandise sales. You might also log the expenses for that performance, such as food shared by the band, equipment rentals or gas. To speed up the entry of multiple transactions, you click the Defaults button for each new transaction to copy the name, date, users and user shares from the most recent event.
Remember that you can log the transactions from your phone at the gig. It's best to do this right away so you don't forget all the amounts involved.
BandHelper takes the guesswork out of dividing the money by showing you exactly how much each bandmate is owed. If you're one of the users with a negative Owed value, this means you will be paying money to your bandmates at some point. For example, if you collect a $400 fee for playing a show, and you're splitting that equally with three bandmates, your Owed value will be negative $300 and theirs will be $100 each. You will need to pay $100 to each bandmate to bring your Owed value down to 0 and theirs up to 0. This is called a Distribution because the money is simply changing hands within the band -- it is not an income or expense. You can follow these instructions when you're ready to distribute money to your bandmates:
- From the Finance > Totals page, you can look at the Owed column to see the users who are owed money.
- From the Finance > Transactions page, click Add a Transaction and you'll see a new Transaction Edit page.
- Set the Type to Distribution.
- If you're distributing income from a recent event, you can click the Defaults button above the Date field to automatically enter some values:
- Date: BandHelper assumes you're making the distribution today.
- Name: BandHelper sets the name to the most recent event's name.
- Paid by: BandHelper assumes you are making the distribution, but you should change this if someone else is making the distribution and you are logging it for them. If you deposited the income into a fund and are now paying your bandmates from that fund, you should set Paid From instead and leave Paid By empty.
- Received by: BandHelper selects the other users from the most recent event, not including yourself.
- In the Shares list, next to each band member's name, you'll see how much they are currently owed. You can click the Defaults button above the Shares fields to pay each person those exact amounts, or you can enter smaller amounts if you want to continue holding some earnings -- for example, if you're saving for a big expense that's coming up soon. You can also raise or lower the amounts to round them off, to make cash payments easier. Any difference will be carried over to the next distribution, so it will all equal out eventually.
- After setting all the fields as needed, click Save, then click Totals in the submenu to return to the Totals page. You should see that your Owed value has gone up toward 0 (from a negative value) and your bandmates' Owed values have gone down toward 0.
- Remember that unless you distributed the full amount owed, the other members' values still won't equal 0, but any remaining value will be carried forward.
- The steps above create one Distribution transaction for payments to multiple band members. But you can also log a distribution to a single user by selecting only that user in the Received By field. This is useful if someone wasn't present when you made cash distributions to the group and you have to make a separate distribution just to that person next time you see them. Another reason to log one distribution per band member is if you're making distributions from a bank account and you want the transactions logged in BandHelper to match the individual payments you'll need to make from the bank account.
- Logging a distribution means that you are literally giving money to a bandmate. Don't forget to actually distribute the money! :-)
Here's how you would log multiple transactions to represent some common band scenarios:
- A band with four people receives a check for $400, made out to the band leader. They are splitting the income equally and the band leader will pay the rest of the band through Venmo.
- Log an Income transaction with an amount of $400. Set Received By to the band leader and set Shared By to all four band members.
- When the band leader sends the Venmo payments, log a Distribution transaction and leave the amount empty. Set Paid By to the band leader and set Shared By to the other three band members. Under Shares, click Defaults to set each member's payment to $100.
- A band with four people receives a check for $400, made out to the band leader, plus $95 in cash tips. They are splitting the income equally, with the cash paid immediately and the band leader paying the balance through Venmo.
- Log an Income transaction with a category of "Fee" and an amount of $400. Set Received By to the band leader and set Shared By to all four band members.
- Log another Income transaction with a category of "Tips" and an amount of $95. Set Received By to the band leader and set Shared By to all four band members.
- Divide the tip cash roughly equally; it doesn't need to come out exactly even. Log a distribution transaction with an amount of $95. Set Paid By to the band leader and set Shared By to the other three band members. Then set the Shares to whatever the cash divided into: perhaps $25, $25, $25 and $20.
- Before the band leader sends the Venmo payments, log a Distribution transaction and leave the amount empty. Set Paid By to the band leader and set Shared By to the other three band members. Under Shares, click Defaults to calculate each member's payment, which takes into account the uneven division of tips. Then send Venmo payments matching those Share amounts.
- Note that since BandHelper tracks any inequalities across transactions, you can do a lot of different things with the tips. For example, you could give all the cash to one person rather than dividing it and that will lead to a lower Venmo payment for that person. Or if one band member leaves early, you could split the tips between the remaining members and that will lead to a higher Venmo payment for the band member who didn't receive tips and lower payments for the members who received extra tips.
- A band with four people receives a check for $400, made out to the band leader. They are splitting the income equally and the band leader will pay the rest of the band from a band checking account. The checking account is set up in BandHelper as a Fund with the Savings setting off.
- Log an Income transaction with an amount of $400. Set Deposited To to the checking account and set Shared By to all four band members.
- When the band leader makes the payments, log a Distribution transaction and leave the amount empty. Set Paid From to the checking account and set Shared By to all four band members. Under Shares, click Defaults to set each member's payment to $100.
- A band with four people receives a cash payment of $500. They agree to take $100 each and put $100 into an equipment fund.
- Log an Income transaction with an amount of $500. Set Received By to the band leader and set Shared By to all four band members. The Shares will show $125 for each band member.
- Log a Deposit transaction with an amount of $100. Set Paid By to the band leader and Deposited To to the fund. Set Shared By to all the band members.
- Log a Distribution transaction and leave the amount empty. Set Paid By to the band leader and set Shared By to the other three band members. Under Shares, click Defaults to calculate each member's payment. Because of the $100 deposit into the fund, the Shares will show $100 for each band member.
- The band leader of a band with four people puts up $400 to pay for merch, then takes all the merch income until that is paid off.
- Log an Expense transaction with an amount of $400. Set the category to "Merch." Set Paid By to the band leader and set Shared By to all the band members. The Totals page will now show that each of the other band members owes the band leader $100.
- At any event where you sell some merch, log an Income transaction with the amount of the sales. Set the category to "Merch." Set Received By to the band leader and set Shared By to all the band members. This will make the amounts owed on the Totals page decrease until the merch is paid off
- With this setup, BandHelper doesn't distinguish between money owed to the band leader for merch versus money owed to the other band members for gig income. If you make distributions based on the owed amounts, you will end up paying back the band leader more quickly using gig income. If you prefer to pay back the band leader using only merch income, you can calculate the distributions manually to only include gig income until the merch is paid off.
- After the merch is paid off, you can enter merch income as above and use the default distribution amounts to share the additional merch income with the whole band.
After you've logged some transactions, you can see how it's all adding up for you and your bandmates.
- Click Finance in the main menu, then Totals in the submenu. A chart appears, listing each active user in your account.

- For each user, you'll see the following items:
- Income: The amount that this user has earned from being in the band. Income for a transaction is shared equally among the users selected for that transaction, unless you override the user shares on the transaction edit page. If you always use equal shares but the chart shows different incomes for different users, that's because some users weren't included in some transactions -- for example, one user was not present at a gig.
- Expenses: The amount of the band's expenses that this user has contributed to. Like income, expenses are shared equally among the users selected for that transaction, unless you override the user shares on the transaction edit page.
- Received: The amount of money this user has actually been paid from the band. This should match the Income value minus the Expenses, Saved and Owed values.
- Saved: The amount of this user's earnings that have been placed into a savings fund rather than paid to the user, and not yet spent.
- Owed: The amount of money this user has earned, minus expenses and savings, but not yet received. Some users will have a negative Owed value (a number in parentheses). This means those users have collected some of the band's income and are still holding it until it can be spent, deposited or distributed to other band members. The total of all the Owed values should equal 0.
- To see the details behind these totals, you can click Transactions in the submenu, then set the filters to show a particular kind of transaction. For example, you could view all the expenses for your band, or view all the transactions for a particular user.
Some venues will ask you to send them an invoice for your performance. You can easily generate that from BandHelper and then keep track of whether the invoice has been paid:
- First, go to Admin > Projects, click Edit for your project, and enter your contact info and payment instructions. This will be used for all the invoices for this project. You can enter the same or different info for each project if you have more than one project.
- To generate an invoice, click Finance > Invoices > Add an Invoice, and fill in the info. You will need to select the recipient as a contact and can create a contact record from here if you haven't already. You can optionally select the event associated with the invoice.
- Click Save, then click the Download button to download a PDF that you can send to your client. (You can add and edit invoices in the mobile apps, but can only download PDFs from the website.)
- When you receive the payment for the invoice, you can come back to this edit page, select the Paid option and save.
- To track the income when an invoice is paid, click Add a Transaction on the invoice edit page. This adds a new transaction with most of the fields filled in. You can change these values if needed, and complete the rest of the required fields, then save.
- To check for outstanding invoices, you can go to Finance > Totals and look at the list at the bottom of the page, or go to Finance > Invoices and select the Unpaid filter. You can then follow up with any contacts that have unpaid invoices.
Note that entering a transaction for an invoice does not automatically mark it as paid, and marking an invoice as paid does not automatically enter a transaction for it. This allows you to use these functions independently, so you could use invoices even if you don't track all your transactions and vice versa.
BandHelper is primarily designed for bands whose members receive income and pay for expenses directly, without the use of a shared bank account. It reduces the need for a bank account by tracking which band members are currently holding any of the band's available income so that it can eventually be distributed. However, for bands that do use a bank account, BandHelper can track that and display current account balances. Other bands don't literally use bank accounts but like to set aside some of their income for future use, and BandHelper can track that, too. BandHelper calls either a real bank account or an informal savings plan a "fund." Here are some notes about how to use them:
- To add a fund to your account, click Finance > Funds > Add a Fund, and enter a name. You can also enter a starting balance for existing funds that already have money in them.
- By default, a fund is designed is to save a portion of band income toward a future expense, so income deposited into it will no longer be considered owed to the band members who earned it. But if you are using a fund as an operating account to temporarily hold and distribute earnings, you can turn off the Savings setting on the account edit page. Then each band member's Owed total will include their share of income that is in this fund.
- You can select a fund when logging these types of transactions:
- Income: If you receive money that you deposit directly into one of your funds, such as a check made out to the band's name and deposited into the band's checking account, you can select the fund it was deposited into, instead of the band member who received it. In the Shared By field, you would select all the band members who helped earn that income, such as the band members who performed a gig.
- Expense: If you pay for an expense directly from one of your funds, such as with a debit card connected to the band's checking account, you can select the fund it was paid from, instead of the band member who paid it. In the Shared By field, you would select all the band members who will benefit from the expense, such as the band members who are participating in an album recording project.
- Distribution: If you distribute income to band members directly from one of your funds, such as with an ACH payment from the band's checking account, you can select the fund it was paid from, instead of the band member who paid it.
- Deposit: If a band member who is holding some of the band's money deposits it into a fund, such as cash received after a gig and deposited into a bank account the next day, you can select the band member who deposited it and the fund it was deposited into. In the Shared By field, you would select all the band members who helped earn that income. In this scenario, you would have an earlier Income transaction showing the band's money being received by the band member, followed by the Deposit transaction when the deposit was made. This is similar to logging a single Income transaction, but shows where the money was held between receiving it and depositing it into the fund. A Deposit transaction is also useful if you receive cash, distribute some of it to band members, and deposit the rest into a fund. That scenario would involve an Income transaction, a Distribution transaction when the initial cash is paid out, and a Deposit transaction when the remaining cash is deposited. If someone joins the band and you want to ask them for an additional contribution toward a large expense, you could log a Deposit transaction and select only that member in the Shared By field.
- Withdrawal: If a band member withdraws some of the band's money from one of your funds, such as cash withdrawn from an ATM to pay for band expenses, you can select the band member who withdrew it and the fund it was withdrawn from. The Totals page will then show that money being held by the band member who made the withdrawal until he or she spends it, and logs that as an Expense transaction. In the Shared By field, you would select all the band members who will benefit from the expense for which the money is being withdrawn. If someone leaves the band and you want to refund them their contributions to the fund that have not yet been spent, you could log a Withdrawal transaction and select only that member in the Shared By field.
- If you use BandHelper to track your funds, you must log every transaction related to that fund. Otherwise, the fund balances displayed in BandHelper won't be accurate.
- If your band does not have a real bank account, it can still use a fund to track its savings, such as money set aside to record an album. In this case, the band can establish a physical location to store that fund's money, like a jar or shoebox, or designate a single band member to hold it. In the latter case, that band member should understand that he or she is responsible for providing the balance of the fund when the band needs it.
- You cannot delete a fund that has been selected on any transactions, and you cannot deactivate a fund that has a balance. If you no longer wish to use a fund, one of your band members can withdraw all the money from it, to spend, distribute or deposit into another fund. That will bring the fund's balance to 0 so you can deactivate it.
- If you'd like to view totals for a given time period, you can use the filters on the Totals page. Don't forget to reset the filters when you're done, because they will be reloaded next time you log in and the totals might look wrong if you've forgotten that the filters are still active.
- In order to keep each users' financial info private from the others, you can turn on the Personal Finances Only option on the user edit page for each person but the band leader. Then those band members will only see their share of transactions and will not be able to add or edit transactions. Also, they will not be able to see other users' transactions or totals, and will not see the Pay field on the event edit page.
Tutorials